Tuesday, 24 April 2012

Oatmeal and Chocolate Sandwich Cookies

The perfect accompaniment to a cup of tea. 

These are fun treats that combine a sweet fluffy filling with chewy textured biscuits. Use this recipe for the oatmeal biscuits without the filling and they are just as delicious. They are perfect for a sweet snack, lunch boxes or even long dog walks as I found out! 

What's more, if you're not a fan of chocolate fillings, there are plenty more options to choose from, such as, peanut butter filling, marshmallow filling, white chocolate and cream cheese. Creating a variety of fillings would make a more exciting and attractive array of biscuits for guests or parties. 

Ingredients
Oatmeal biscuits:


  • - 175 g self-raising flour


  • - 75 g porridge oats


  • - 175 g granulated sugar


  • - 1 tsp bicarbonate of soda


  • - 1 tsp baking powder


  • - 175 g butter


  • - 2 tbsp golden syrup


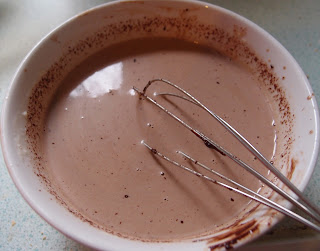
  • Chocolate Fudge Ganche (used in previous recipe)

    Method:

    1) Put the flour, oats, sugar, bicarbonate of soda and baking powder into a mixing bowl.
    2) Put the butter into a bowl and melt (either in the microwave or on the stove), add the golden syrup.
    3) Combine the dry and wet ingredients, to form a dough. 
    4) Make 2 pound coin sized circles, place on baking tray and cook for 10mins at 180C.
    5) Place cookies on cooling rack and leave till completely cooled. Make the chocolate fudge ganche. 
    6) Once cooled add the filling to one side and place another cookie on top.

    Friday, 20 April 2012

    Vanilla, Coffee and Chocolate Cake

    Its here..... the solution to choosing what type of cake you fancy eating. 
    This cake gives you everything in one; vanilla, coffee, chocolate and chocolate fudge ganche icing. Believe me, it's irresistible
    Thankfully, I had a couple nieces who spotted it and instantly wanted a piece. 
    Don't expect this cake to stay around for long!
    It's perfect for a special occasion such as a birthday celebration or even just a sunday afternoon tea treat with friends or family. 
    What's more, its not difficult, there's no complicated ingredients, it's your average sponge cake with added flavours, so why not give it a go, it's eye catching and very tasty!

    Ingredients: (need another half measure of all ingredients)

    • 120 g / 4 oz Self raising flour
    • 120 g / 4 oz Butter - softened
    • 120 g / 4 oz Caster Sugar
    • 1 tsp Baking Powder
    • 2 medium eggs

    Method:

    (Make one mixture and half it before adding the 2tbspns cocoa powder to one half and 2 tbspn strong coffee to the other half.)

    1) Cream the butter the sugar until light and fluffy

    2) Add the eggs one at time

    3) Fold in the flour.

    4) Separate the mixture, add 2 tbspns cocoa powder to one half and 2 tbspn strong coffee to the other half

    5) Put into greased cake tins.

    For the Vanilla sponge, just half the ingredients above and follow the same method. 

    6) Put all cakes in the oven for 30 minutes at 160C.

    7) Take out and remove from tins to cool completely.


     Chocolate Fudge Ganche Filling

    • 125ml double cream
    • 150g good quality plain chocolate
    • 100 grams Fudge (optional) otherwise just add 50grams more chocolate and 50 grams butter.

    1) Melt together in a bowl over a low heat.

    2) Leave to cool for 30 mins

    3) Layer the cake with frosting as below:
    Start with the chocolate cake on the bottom, then add a layer of frosting on top. Then add the coffee cake and frosting.
    Top with final layer of Vanilla cake 
    Add the frosting to the top of the cake. Then using a palette knife, apply to the sides of the cake.


    Sunday, 15 April 2012

    White and Dark Chocolate, Hazelnut Tart with Raspberries and Blueberries.

    The perfect dessert for a Sunday Lunch!

    This tart has come from the well known White Chocolate and Raspberry Tart, which is the ideal combination of sweet from the chocolate and sour from the fruit. However, I wanted to be a bit more creative. Therefore, firstly, I added ground hazelnuts to the pastry, making it lovely, crisp and interesting. Then for a contrast of colours and also to help re-enforce the pastries strength and prevent it becoming soggy on the bottom (if making in advance), I covered the inside of the pastry with melted dark chocolate. This was also a great semi-sweet layer which gave an added flavour and texture boost. 

    Now, I have to admit.... I did not make enough filling for the size of my pastry case.... however I think that was firstly, because I ended up not having enough white chocolate (I may have eaten a few pieces) and secondly because I cooked the pastry round the outside of the tin it was bigger in size. I guess its better than over filling it and allows a good view of the dark chocolate. 

    Just looking at the picture of this tart makes me crave it again!
    So here is the recipe, its very easy and simple to make, the pastry is probably the most difficult part. 

    Ingredients

    Hazelnut Pastry:
    • 100g Plain Flour
    • 25g Ground Hazelnuts
    • 50g cool, Unsalted Butter 
    • 25g Icing sugar
    • 1 Egg Yolk
    • 1tbsp Cold Water

    1) Place the flour and salt in a large mixing bowl and rub in the butter until the mixture resembles fine breadcrumbs.

    2. Add the nuts and sugar, then the egg yolk and water. Mix with a knife until the mixture starts coming together then gather together with your hands, turn onto a floured surface and form into a ball.

    3. Wrap the pastry in cling film and rest in the refrigerator for 30 minutes. 

    4. Line a tart tin with the pastry (I turned the tin over and baked the pastry round the outside to easily get it off the tin), bake for 
    30mins or until light golden brown.


     5. Once your pastry is cooked, allow it to completely cool and melt 75grams of dark chocolate and apply it to the inside of the tart.

    6. Set the pastry back into the fridge to cool.


    White Chocolate and Mascarpone filling:

     
    • 200g White Chocolate
    • 250g Mascarpone
    • 150ml Double Cream
    7. Heat the cream over the stove or in the microwave, add the white chocolate and then the mascarpone.

    8. Allow to cool and then add to the tart casing.


     9. Top the tart with a packet of raspberries and blueberries.


    Hey Presto ..... its ready to eat!!

    Pork with Pears, Red Onion and Blue Cheese


     Pork and Pears..... sounds great let alone tastes great together. This is a good variation on your average pork and apple combo ( though I have to admit I did sneak an apple in there too).

    I used pork minute steaks for this recipe as they are nice and thin and quick to cook.

    This is the perfect Sunday Lunch recipe, and the best part about it is its extremely quick to make!

    Theres no putting the joint in to roast for a couple hours, it literally takes 20minutes or less from prep to table.

    Recipe:
    serves 4
    • 4 Pork Minute Steaks
    • 2 Pears
    • 1 Apple (optional)
    • 2 Red Onions
    • 50g Blue Cheese


    1. Heat a roasting tin with a tablespoon of oil on the hob (use 2 rings),

    2. Add the onions, pears and seasoning (salt pepper and rosemary). Fry for 5 mins or until just starting to caramelise.

    3. Heat the grill and season the Pork. Add it to the roasting dish and fry for 2-3minutes either side.

    4. Add the cheese on top and transfer to the grill, until its melted. 


    Its best served with olive oil, sea salt and black pepper new potatoes.  


    Just boil the quartered new potatoes until soft and transfer to the frying pan to brown with the seasoning and oil.

    Saturday, 14 April 2012

    Apple and Custard Mini Cakes


    These mini marvels with a surprise centre are delicious and different; not your average fairy cake with some icing and sprinkles. 


    Bake them with kids or as I did, for someones work treats and they'll be employee of the week! 


    If you haven't got any apples or canned apple. Why not try custard and jam, marmalade or lemon curd?


    Ingredients:
    • 100g caster sugar
    • 100g very soft butter
    • 100g self-raising flour
    • eggs
    • 1 tsp vanilla extract
    • 60mls think prepared Custard
    • 125mls canned apple ( or cooked and sweetened apple)
    • 1/2 tsp cinnamon 


    1. Pre heat the oven to 180C

    2. Cream the butter and sugar together until light and fluffy.

    3. Stir in the eggs one at a time and add the vanilla.

    4. Fold in the flour and cinnamon. 

    5. Put one teaspoon of the mixture in fairy tin cakes or different mini cake mould (I used stars) 

    6. Add half a teaspoon of the custard, then half a teaspoon of the apple to the centre of the cake mixture.

    7. Cover the filling with cake mixture, make sure to only fill the cases half full. 

    8. Put in the oven and bake for 10-15mintues.  Glaze with the apple or jam.


    N.B. for an extra treat try a cream cheese icing on top.


    Friday, 13 April 2012

    Lachha Paratha (layered flatbread)

    This bread, I only came across on holiday in the Maldives. It was made fresh by one of the chefs.... a character who could greet every person in their native language, now thats an achievement, along with his cooking skills of course. 

    I'm very grateful to have been introduced to this dish as its so easy and versatile, you can cook up a great curry to serve it with, have it with yoghurt and vegetables or even eat it as a sweet treat.  

    Unfortunately, as I was so desperate to attempt this new found marvel.... I didn't use the right flour. Instead, I used wholemeal bread flour in place of wholewheat. So mine were a bit heavier then they should have been, but the same concept is there.  


    Ingredients:                                       (makes 4 parathas about 5-6 inch diameter each)

    • 250 g whole wheat flour or Atta (fine milled whole wheat flour available in Indian stores) 
    • 1/2 tsp salt 
    • 3 tbsp ghee or melted butter (may use oil as a substitute)
    • 125ml luke warm water or milk,  just enough to make a smooth soft non sticky dough
    • oil/ghee/butter to brush on the paratha while rolling and frying


    Method:

    1) Sieve the flour and salt into a bowl. Rub the melted butter(ghee or oil) until the flour forms crumbs

    2) Add warm water gradually, a little at a time. Knead until smooth. Cover well and leave aside for about 30 minutes to an hour.

    3) Knead  it again for a couple of minutes; divide the dough into 4 portions. Shape into a ball, then flatten them. Roll out each flattened ball into a circle (8 inch diameter)/ as thin as you can get them. 
    4) Brush some melted butter/ghee on the top of the dough and dust some flour on top. 
    5) Forming the dough:
    - Start from one end; hold the left and right side of the end with fingers and then start pleating, like doing a paper fan. 
    - Do small folds, (6-8) the more you do the more layers you will have.  
    - Once you have reached the other end,  it will look like a  rope. Press both the ends with your finger tips.

    - Pick up the rope up and  twist it, (move each hand in an opposite direction, to look like a twisted bread stick).

    - Rolling it up into a spiral shape. Take the end tip and press it down on the top or the sides, so it does not open while rolling. Flatten it with your palm. 

    - Then roll it carefully without pressing too hard into (5″-6″diameter) circles.

    - Heat a frying pan or griddle and cook (on medium heat) on both sides. When you see tiny brown spots appear, brush on about half to one teaspoon of ghee/butter/oil and flip it over.  
    - Then add 1/2 tsp of ghee/oil on the top, flip it over and cook this side in the same way as you did the other side.
    Once cooked take them out and crush the edges together to make the layers more visible and soften up the bread.
    They are best served hot from the pan.

    Knead
    Roll out - butter and flour
    Pleat 
    Twist and roll up 
    Rolled up ball
    Ball rolled out - ready to cook


     Why not try it served hot with sugar and yoghurt ....... and add your own English touch with a cup of tea!


    Tuesday, 10 April 2012

    The Olive Press Restaurant Review


    Overall: 3.5/5 

    For dinner I was looking for a restaurant that was good quality but not pretentious, allowing for a relaxed, comfortable meal.  The Olive Press ticked the boxes and was also not your average restaurant chain for italian meals and offered a good range on the menu.


    The decor created a clean, fresh look to the restaurant with some added style elements, namely  exposed brick walls, beams and pillars, along with artwork and an open plan kitchen.
    However the restaurant does seem quite small and impersonal, making it quite hard to fall in love.
    I will add however, that we had a table at the back near the till and disabled toilet, which may have taken away from some of the restaurants atmosphere.
    Mojito


    We began with mojitos, which hit the spot and weren't over sweet as some can be. The restaurant had a good variety of cocktails on offer including; "ps I love you".


    Garlic Pizza bread with rosemary and sea salt


    For starters we shared a garlic pizza bread between three. This was a good sized portion, however it lacked flavour and the sea salt, rosemary and oil olive was spread very thinly with some pieces looking extremely bare. 
    A positive was the presentation on the wooden board, coming uncut allowing for diners to cut it how they would prefer. A good personal touch. 


    Flattened rump steak with garlic, chilli, 
    peppercorn, sea salt, rocket and grana padano 
    Polenta Chips


    For mains, I chose the rump steak and teamed it with polenta chips, which I have never tried before and was please to see a different alternative to the average fries.
    We put the waiter through his paces asking about the steaks and he informed us that the rump was less fatty and therefore less chewy than the other cuts available.
    However, I was slightly disappointed with it. Firstly we could only choose pink or well-done and having chosen pink, I was let-down when I couldn't find any pink meat. Secondly, the chilli was over powering but not to the point of being inedible.

    The polenta chips on the hand, were tasty, well presented and innovative.

    Overall, the restaurants positives are a great menu, good decor and experienced staff. I would therefore recommend it for a relaxed dinning experience. Our meal ended up quite expensive even with 10% discount. However, if you choose other meals it would be cheaper and if I returned I would go for the Baby scallops and prawn spaghetti tossed with tomato, anchovies and capers, my second choice at the time. 


    Double Chocolate Shortbreads

    Wanting a chocolate fix at Easter time but you're sick of chocolate eggs and easter bunnies??
    Why not make these delicious chocolate shortbreads?!
    They require only 5 of your basic store cupboard ingredients and I'm sure at this time of year you could find some chocolate somewhere if you're quick! 
    They are melt in your mouth beauties that go perfectly with a glass of warm milk.

    Follow on Instagram

    Contributors